

Holiday traditions. Many of us have them, regardless of what holiday we celebrate this time of year. It seems that traditions, new or old, have a strong place in our hearts. One such tradition for me is enjoying my friend Mel and her brother’s chess cakes. If I had to categorize this on my holiday tradition continuum, it’s relatively new for me. But regardless, taking a bite of that chess cake signifies that the holidays are here.
Mel is a hostess through and through. She loves to host parties and entertain. The crown jewel of the many parties she hosts is her annual Christmas celebration. Mel goes all out. She transforms her garage into a kid zone, complete with a video game area and a kid-friendly buffet. She hires the local high school choir to sing Christmas carols, she enlists a friend to dress up as Santa. All of Mel’s guests leave her party with a lottery ticket from Santa. I’m telling you, this party is the real deal. Being the sweet crazed person that I am, the dessert table is my favorite thing about Mel’s party. Picture a large dining room table filled with homemade goodies. The centerpiece of the table is always a tower of the chess cakes. I usually park myself in front of that table for a decent amount of time during the party. Yes, I’m that guest who overindulges.
As traditions sometimes go, Mel adopted the chess cake and turned it into her own holiday tradition, and passed it along to her brother. Below is the making of the chess cake tradition in Mel’s own words.
————————-
The chess cake recipe is a modification of a cake that my sister’s mother-in-law made for us while we were visiting her in Florida. The first time I had chess cake, it was baked in a glass dish and the consistency was very gooey in the center with the filling creating an almost iridescent layer on the top. That near magical consistency bubbled and browned at the edges to form something that I feel words simply cannot do justice without an actual cake in your hand to taste for yourself. My favorite parts were the corner pieces, and this love affair with the crust motivated me to create a version in cupcake tins which would form individual-sized cakes with the characteristics of the corner pieces.
To prepare for my Christmas party, normally I would bake about 20 hours a day for three days with my brother Chris as my sous chef. One year, a last minute business trip threatened the very existence of my annual Christmas celebration. That year, Chris had to take on full baking and party prep responsibilities. My business trip and the problem customer I was visiting were being ruled by Murphy’s Law. I flew home just 19 hours before the party, having missed my original flight. I had to run to the gate and board the last plane out that night just as they were closing the jetway door. As I drove home, I felt physically ill and emotionally exhausted as I made the turn onto my street. I had a feeling of utter dread and sadness about my lack of preparation for my party.
As I drove up to my house, my mood started to dramatically improve, and much to my surprise, when I walked through the door, the house smelled as if it were a dessert itself! My brother Chris had proved himself as a baker and party planner. The next evening at the party he received countless compliments from my guests, which would elicit his charming pursed-lip smile and head bob in acknowledgement. From that year on, the chess cakes that Chris so masterfully prepared became his signature delight, and I wouldn’t make them again until the night before his memorial service.
————————-
Chris passed away in October of 2009 when he was only 26. I’m an only child, so I will never fully understand sibling relationships, but I do know this. I’ve never seen someone with such a fierce, protective, loving and genuine bond than what Mel had with her brother.
In December of 2009, just two months after Chris was gone, Mel couldn’t bear to host her Christmas party. It was the first time since she started hosting the party in 1993 that her house wouldn’t be filled with guests and chess cakes the second weekend of December. So many memories of spending hours in the kitchen with her younger brother was a source of sadness for Mel. She had lost her brother and closest friend.
Mel and husband recently relocated to a different state, which means, in addition to not seeing my friend regularly, there is tragically no chess cakes for me to savor during the holidays. I never understood how important having chess cakes during the holidays was to me until Mel moved and took her recipe with her.
Lucky for me, Mel decided to share her recipe, which includes many modifications that her brother Chris made throughout the years he took over chess cake baking duties.

Mel and Chris’s Chess Cakes – modified from Elsie Malloy of Monticello Florida
1 box butter yellow cake mix (Mel likes the brand with the red spoon on the top)
1 stick of butter, room temperature
4 eggs
8 ounce package of cream cheese, room temperature
1 box powdered sugar
1 cup coconut flakes, preferably the unsweetened variety
1 cup whole pecans
¼ cup butter flavored Crisco
4 tablespoons vegetable oil
Prepare the baking pans
For the traditional method, use a 9×9 glass or metal pan. Grease generously prior to pressing in the crust. This is the version Mel was first introduced to.
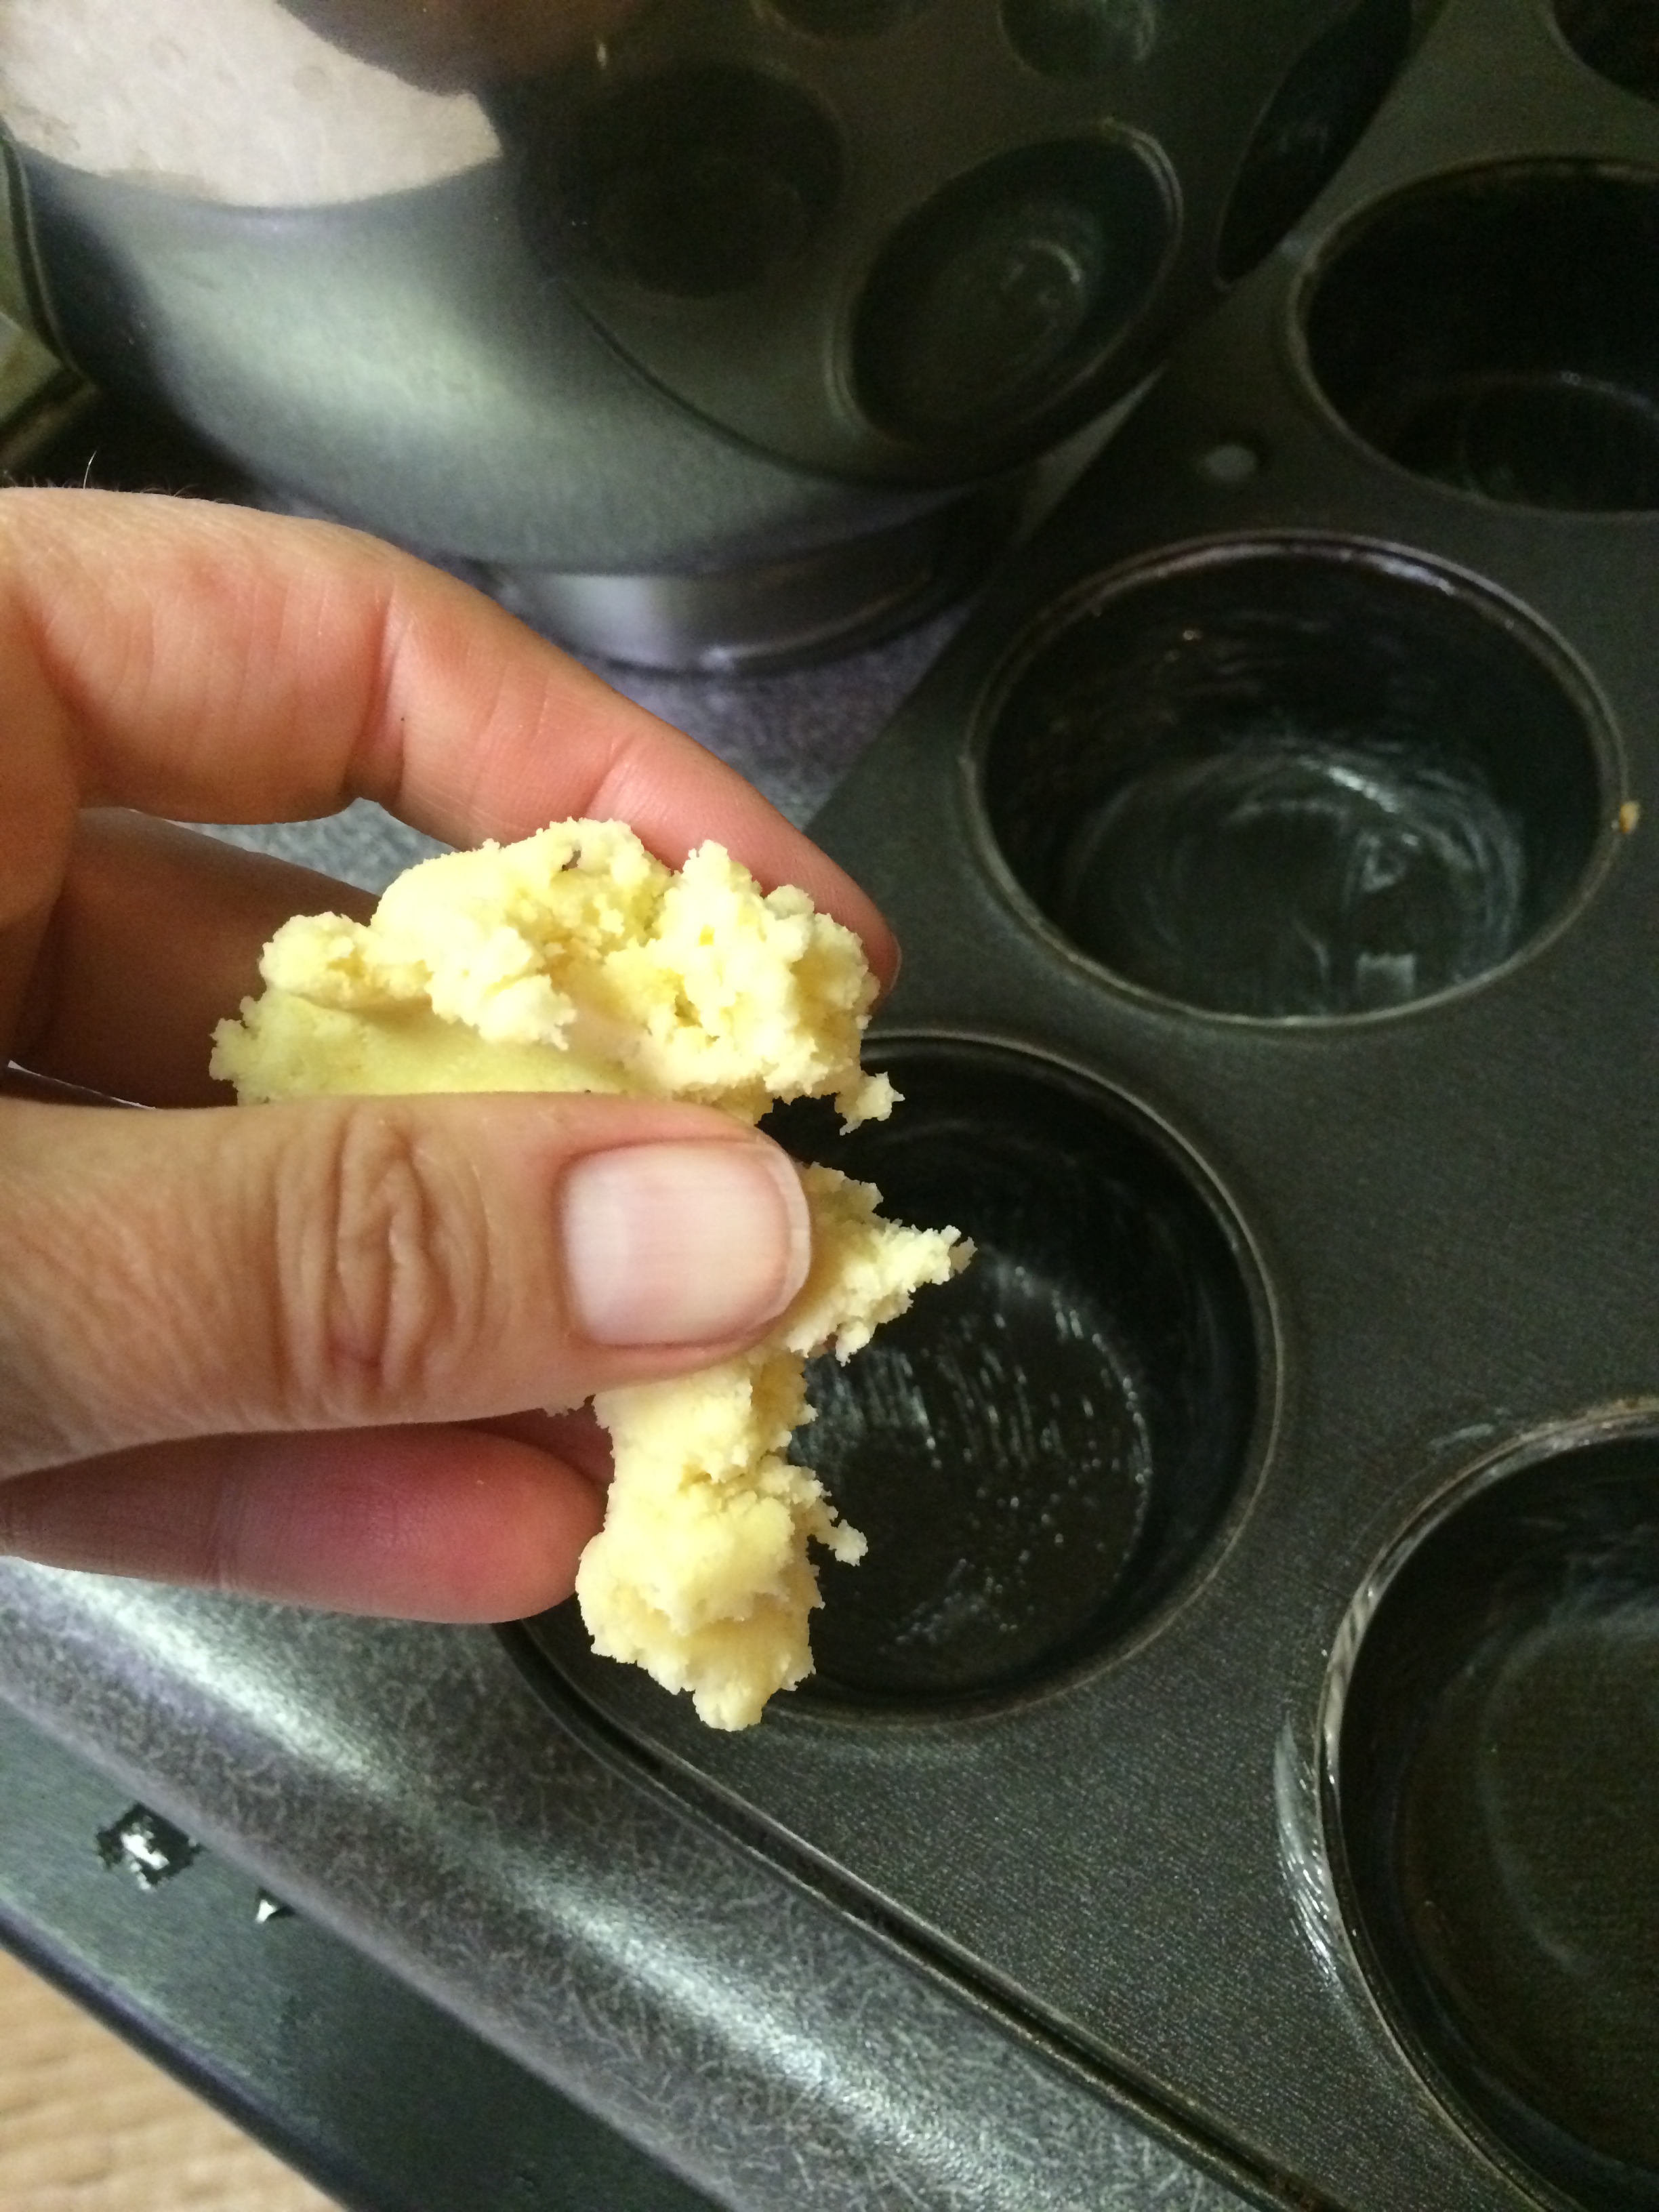
For the Chris method, use cupcake or muffin tins. Wipe or brush with butter flavored Crisco, then take a brush and smear on a layer of vegetable oil. (This is the variation that Mel created for never ending crusty corner pieces before those fancy zig-zag brownie pans came out.)

Crust
1 box butter yellow cake mix
1 stick butter, softened
1 egg
1. Preheat oven to 325 degrees.
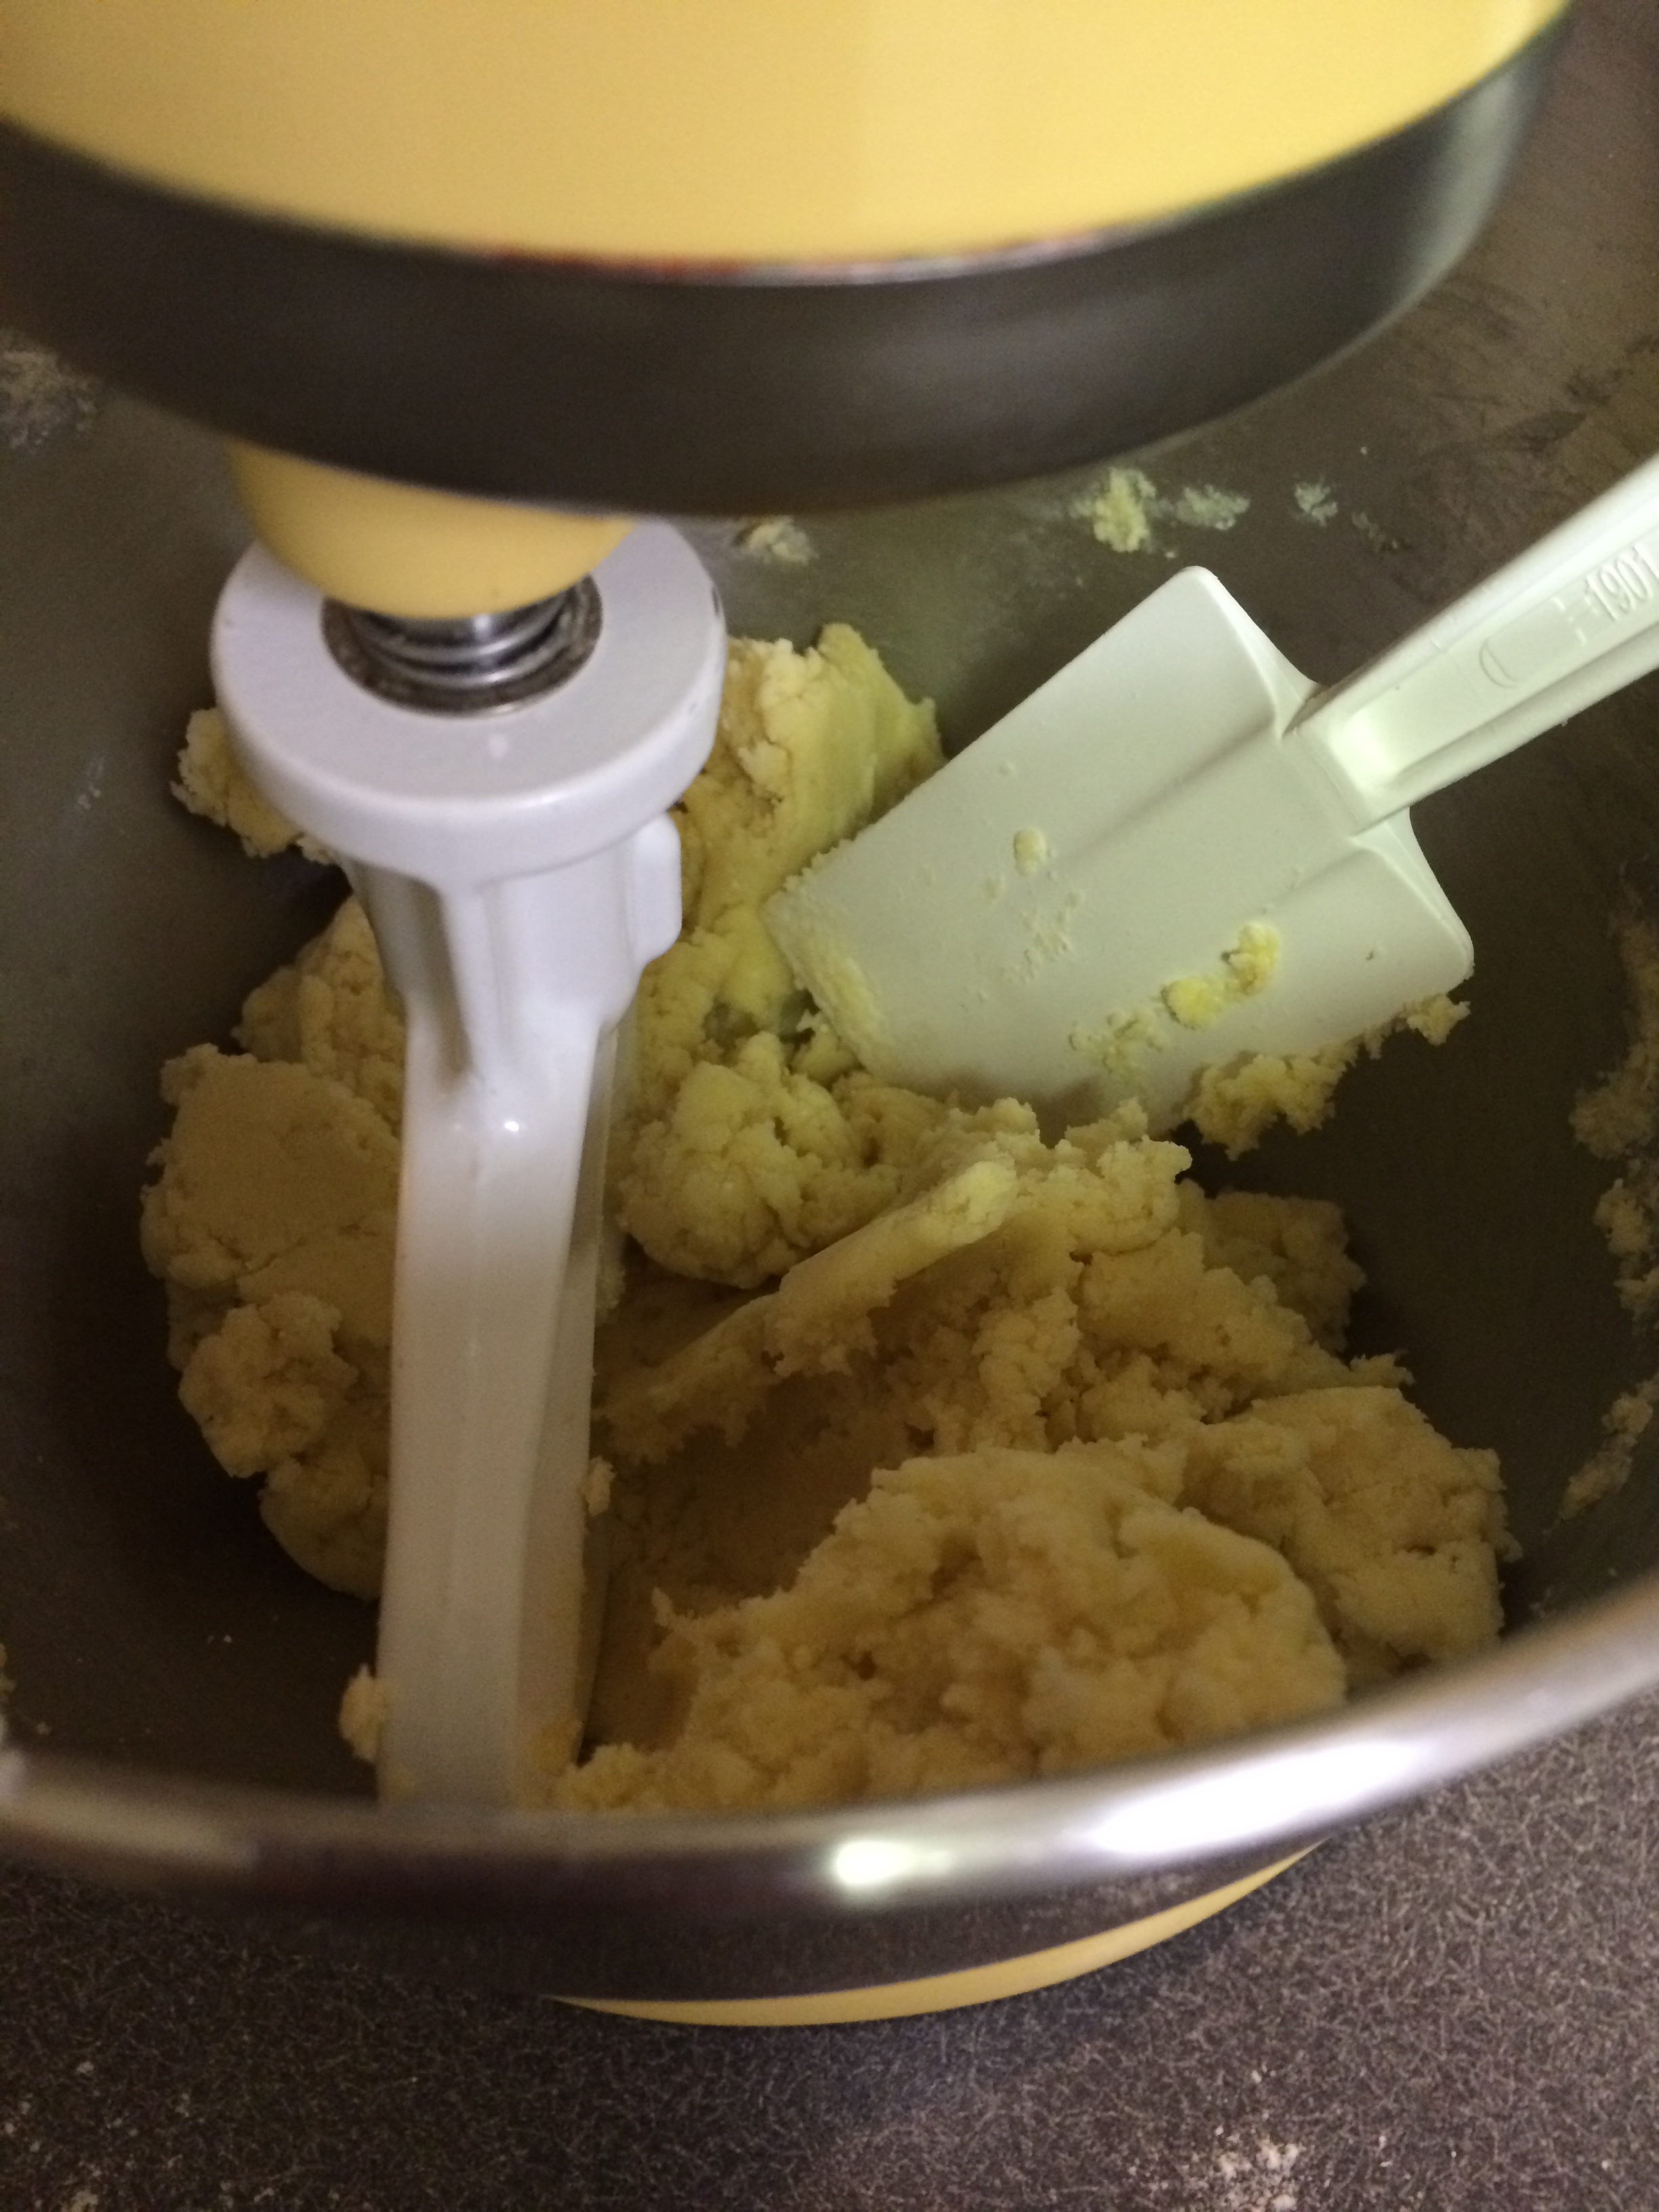
2. In a mixing bowl fitted with a paddle attachment, incorporate the butter with the cake mix until you no longer can make out the butter, then add the egg and mix until crumbly, but firm.
If you are following the traditional cake pan method, press the crust into the bottom of a greased baking pan.
For the Chris cupcake tin method, separate the dough into threes and then pinch off silver dollar-sized portions and press in the bottom of the cupcake tin. Mel likes to roll the crust dough into about 30 ¾” balls. Then press into the prepared cupcake pans, but Chris didn’t feel being so precise was necessary.
Filling
3 eggs
8 ounce package of cream cheese, room temperature
1 box of powdered sugar (3½ cups)
1 cup coconut flakes, unsweetened natural coconut
1 cup whole pecans
1. With a stand mixer fitted with a whisk attachment, whip the cream cheese. Spoon the sides of the bowl down, and whip again, spoon, and whip again. The cream cheese should be very smooth before other ingredients are added.
2. Add 3 eggs and whip again, spooning down the sides frequently. Continue to whip as needed to create a creamy liquid consistency without any cream cheese lumps.
3. Slowly add the powdered sugar while the mixer is on a slow speed. Increase the speed to fully incorporate ingredients. The mixture will maintain a slightly liquid appearance.

4. Combine 1 cup of coconut flakes with 1 cup of whole pecans in a food processor or chopper, and pulse until pecans pieces are about half the size of a Tic Tac. This might be a personal preference, but it’s a good idea not to over process the nuts into crumbs. If you are using a small chopper, follow this step in several small batches. If you are using pecan pieces versus the whole nut, you may want to skip the food processor, or process the coconut first, then add in the pecan pieces and pulse just a few times.

5. Spoon down the sides of the cream cheese/powdered sugar mixture, then add coconut and nuts while stirring to fully combine.
6. Spoon the batter over pressed crust mix in the pan, about 2/3 full if using a cupcake tin. Do not overfill the tins.

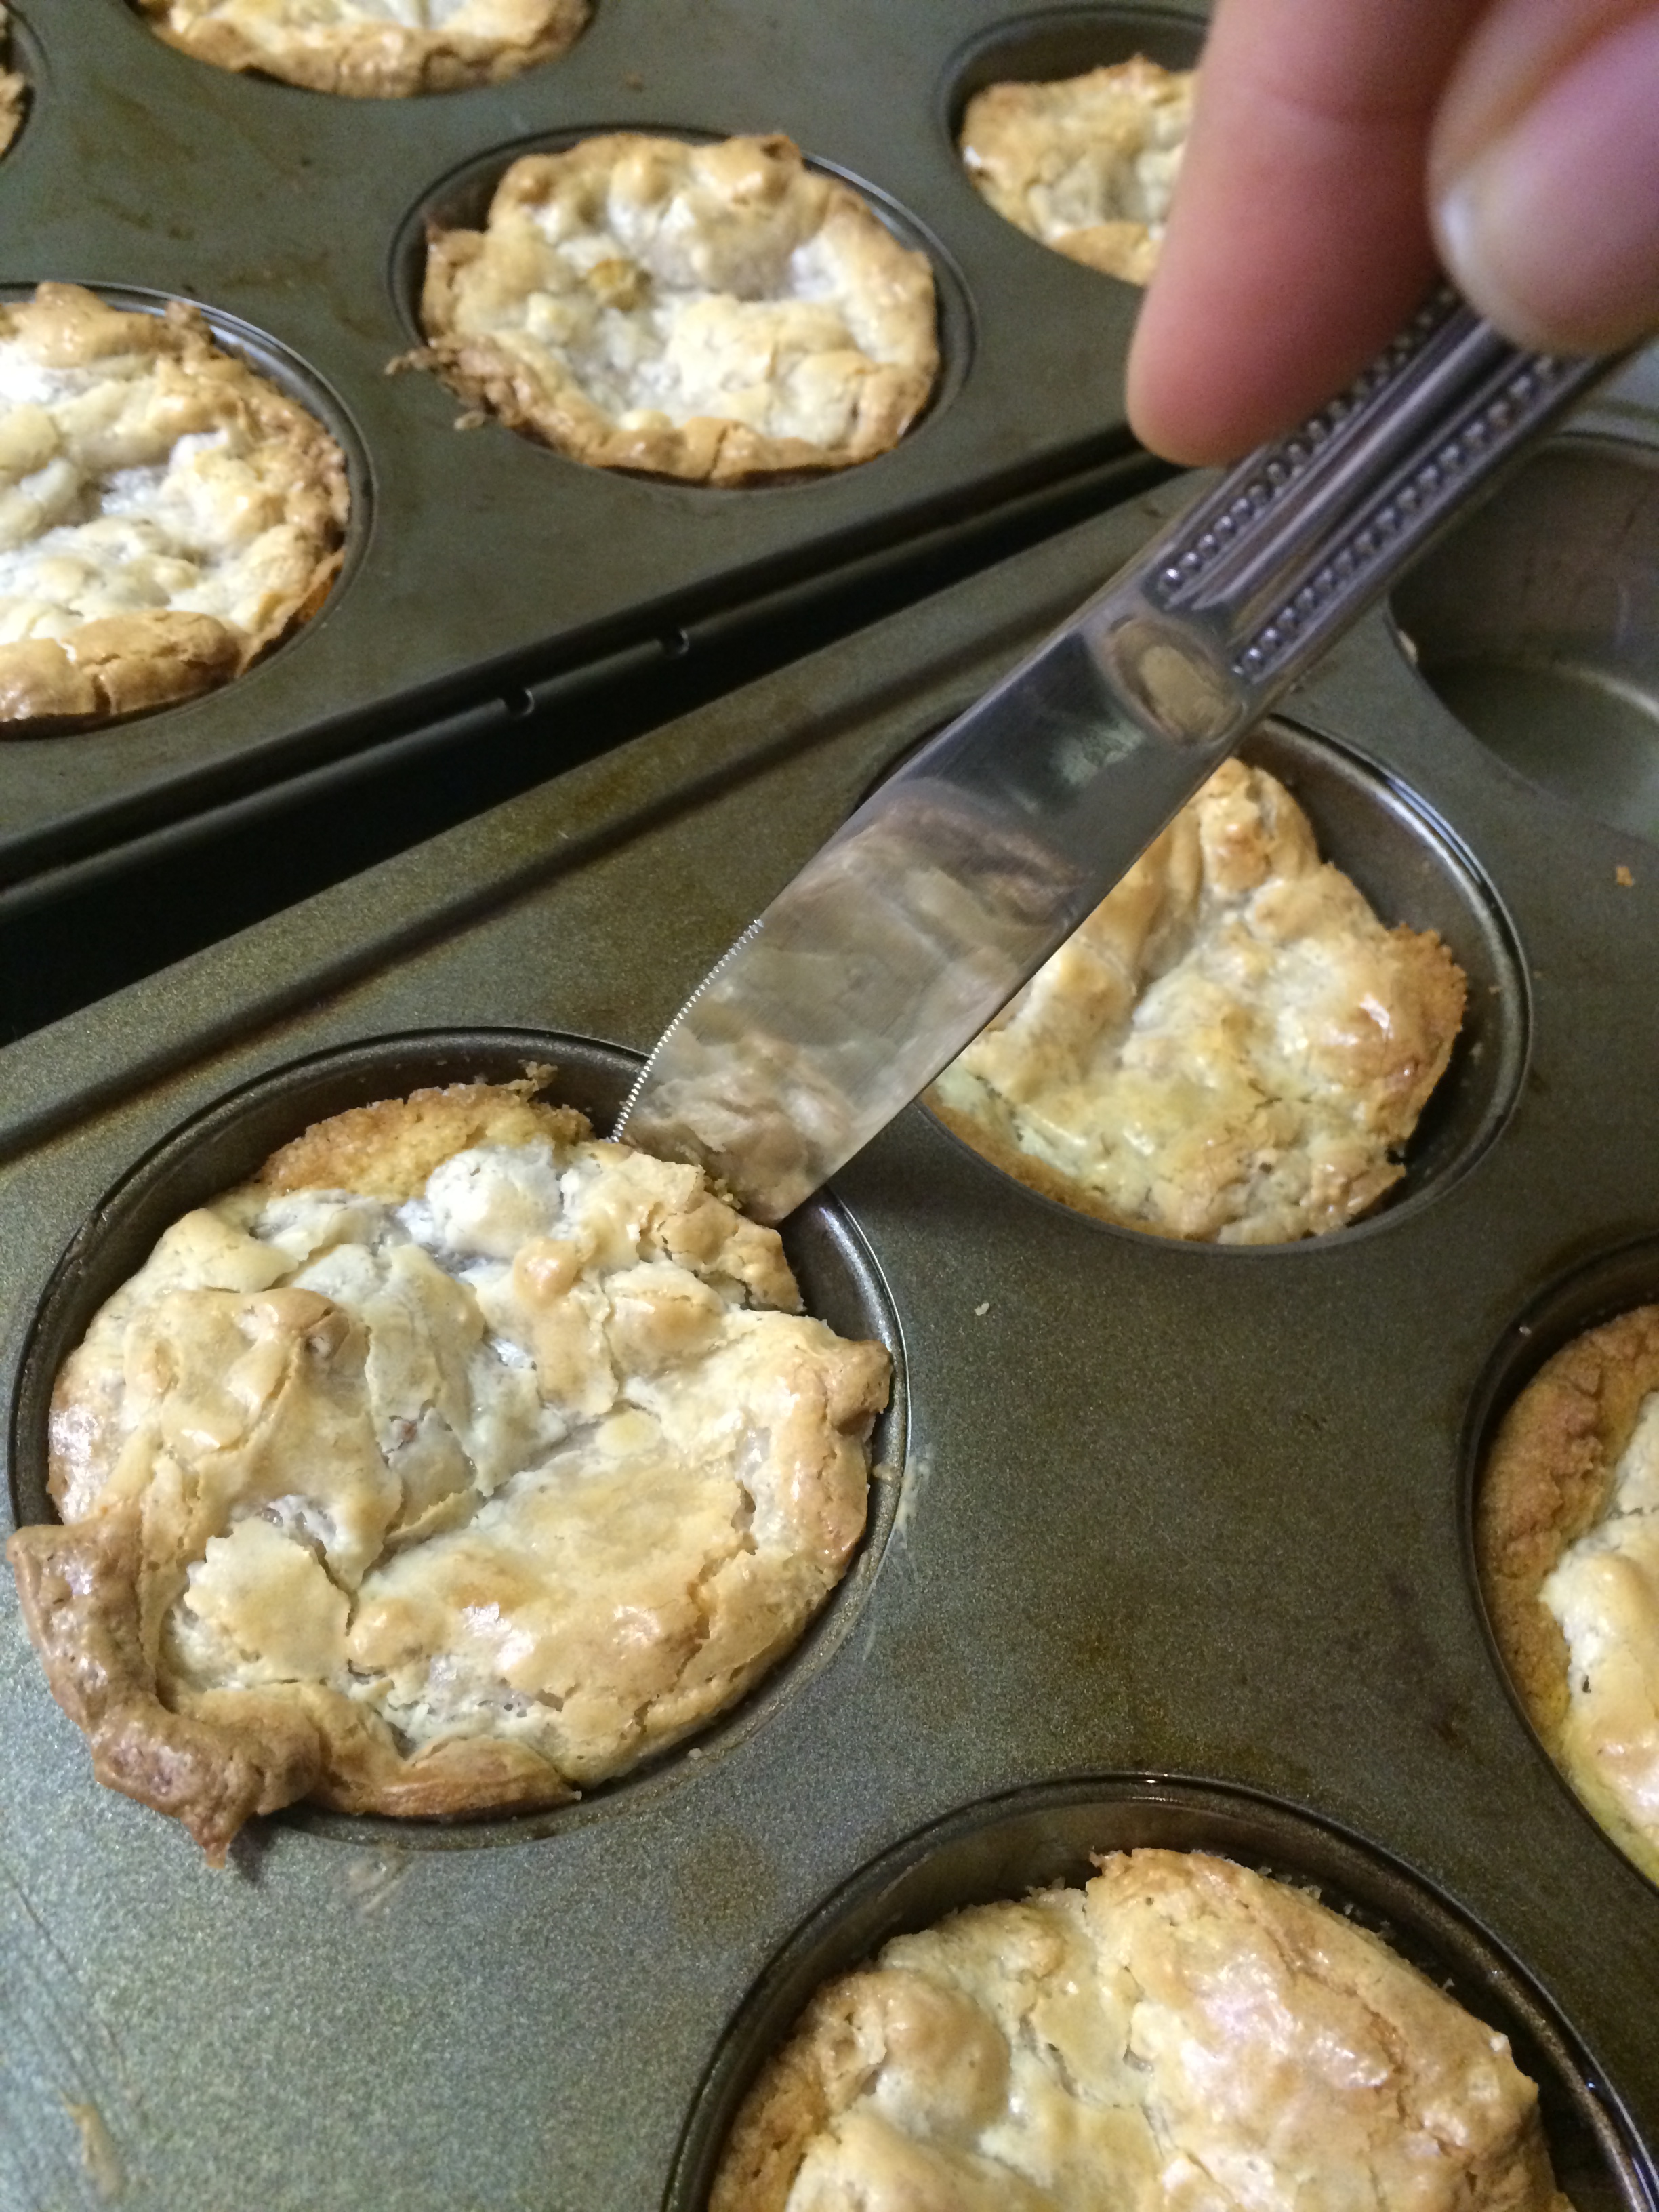
7. Bake in preheated 325 degree oven for 1 hour if using a 9x 9 glass pan or 45 minutes if using a metal pan. The edges will appear light brown, and the center will be a lighter iridescent, cracked surface.
Bake in a preheated 325 degree oven for 25 to 35 minutes if using cupcake tins. Edges will look darker than the center’s cracked texture surface and will pull from the side of the pan when done.
8. Cool in the pan, then take the dull edge of a butter knife to help release the sides from the pan of each mini-cake. The cakes are much easier to remove from the pan when cool.
Chris’s tips
- When making several batches, make each one separately, and set aside in a larger bowl to ensure consistency, versus doubling or tripling the recipe (I never do this…but maybe that’s why his tasted sooooo good).
- Don’t bother rolling the crust into balls, just take a pinch of the dough and put it at the bottom of the cupcake tin (I like to be precise…but maybe that’s why mine didn’t send people through the roof).
- If making in cupcake tins…be sure to only fill 2/3 full, or you’ll have trouble getting them out of the pan. (I always over-fill, partly because I forgot to make them after so many years of having Chris do it).
- Put the coconut and the nuts in a food processor and mix together so the flavors infuse (I thought this was too much trouble…but maybe that’s why his tasted sooooo good).
- Don’t forget to grease the cupcake tins with butter flavored Crisco (not the regular kind!!)
- Watch them closely, and don’t over bake. (He used 30 minute TV shows, and scheduled commercial breaks as his gauge, but I recommend a timer).
- Always use quality control before serving! (We both did this, and enjoyed doing it together!!!)
